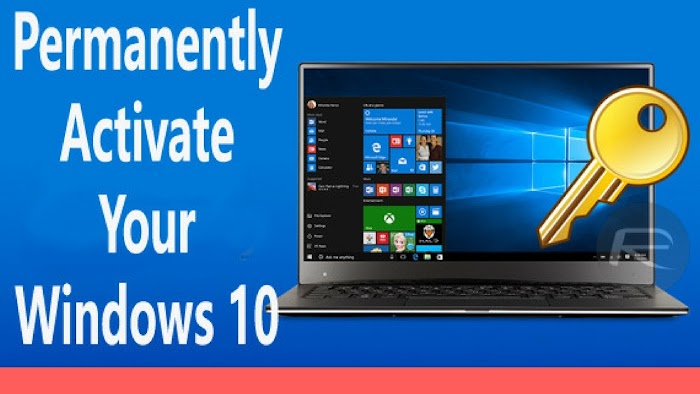
Permanently Active Windows 10 Using CMD
Two days ago, Microsoft officially released Windows 10 after a month-long free beta test. In the last few days, more and more users are trying to install Windows 10 for testing and seeing that it is, indeed, a huge improvement over the previous iterations of the operating system. Even though upgrading to Windows 10 is pretty easy thanks to Microsoft’s installer, some users might find themselves in need of using the command line to activate their copy of Windows 10 after installation.
1. Getting Ready to Activate Windows 10
If you are the type of person who likes to get a head start on things, you are probably wanting to get ready to activate Windows 10 as soon as it becomes available for download. Microsoft is now allowing people to reserve their free Windows 10 upgrade. You have to reserve it before July 29th, 2015.
Of course, this doesn’t mean that you can’t use the operating system on a previous version of Windows. You can still install Windows 7 Professional alongside Windows 10. (Remember, this is standard Microsoft operating system support; if you are on Windows 7 Home or Windows 8 then you are still eligible to get Windows 7 Professional). And hey, if you already have Windows 7 Professional installed on your computer and all of your applications and files have been updated to work with Windows 7 Professional, then applying for Windows 10 is pretty easy now that you log into your cell phone. Maybe you already have Windows 7 Ultimate installed, but if you don’t, don’t worry--that version of the OS (built on Windows 8) doesn't run the same basic file structure and can easily install on a previous version of Windows even if it will only go on Windows 7. You will just have to get used to Windows 10 being a completely new operating system.
What Can You Do With Windows 10?
Here are a few of the major improvements that Windows 10 offers: Universal Apps
The ability to install and run desktop apps on your Windows 10 PC is more streamlined than ever before. Windows 10 uses the Win32 file format to install apps, Desktop Feeds (which provides information about installed apps), and will even offer to download and install apps from the Windows Store. This will make installing and running desktop programs much easier and speeds up the process of finding and installing apps from the Windows Store. Multi-device setup
Windows 10 allows you to switch between different computing devices (PC, tablet, or phone) by accessing the settings on the screen.
2. Enabling Hidden Administrator Mode on Windows 10
Windows 10 is a great operating system but it’s not without its flaws. One of the most important features that were removed in the latest version of Windows is the ability to enable “hidden administrator” mode. This feature is very useful because it allows you to use your computer without being tracked and gives you more privacy. Unfortunately, Microsoft left this option out of the latest operating system because it would not fit their vision of the modern Windows experience.
Luckily, there is a fix, and you can enable hidden administrator mode by visiting the registry and using the REG32 value for HID.
After installing the fix, you’ll need to restart your computer for the changes to take effect. You’ll also need to have administrator privileges.
The steps to enable hidden administrator mode in Windows 10 are quite simple. First, open the Start menu and type regedit.exe. Once the path opens, navigate to the following directory and then click the “HKEY_LOCAL_MACHINE\SOFTWARE\Policies\Microsoft\Windows\Windows Search” key.
Once you reach the folder that is already opened, right-click on the “DisableLUAProtection” key and select Set, and then click OK.
With that done, launch the Windows update program and perform a clean install. After installation, your Windows 10 setup should detect the hidden administrator mode and prompt you to enter it. Simply select “Yes” and then restart your computer. By the way, this is how the Start menu looks after installing Windows 10. Believe it or not, but the Start menu was missing from earlier Windows versions.
Yes, you can still install third-party desktops and split-screen applications on your new Windows 10 computer but you’d have to reinstall the Windows operating system to do so.
Fortunately, some Windows 10 users have created USB drivers for older hardware. However, Microsoft removed the ability to install such proprietary software drivers from Windows 10. You can still use some third-party software to improve and extend your Windows 10 experience but developing for Windows 10 requires hassle-free third-party software.
Luckily, these third-party programs come highly recommended for getting the most out of the latest operating system.
3. Activating Windows 10 Using Command Prompt
Here's how to do it using an elevated command prompt: Click Start, search for CMD, right-click the Command Prompt shortcut and click Run as administrator. Type the following command to see whether Windows 10 is activated on your PC: slmgr /dlv If you see a screen like the one below, Windows 10 is activated on your machine. However, check to make sure it’s activated and set up properly before proceeding.
Activate Windows 10 with your old user profile
If you upgraded using the Windows 10 Beta for Itself (instead of the traditional ISO), then no worries, actually activating Windows 10 is pretty easy. All you need to do is open up your old user profile and follow these simple steps:
) Right-click on the desktop background.
) Click Copy All, then select Yes.
) Right-click on Windows 10, then click Settings and confirm Yes.
) Next, start by clicking the Task View button to see which system files are installed.
) Scroll down to the bottom and click on User Configuration.
) Click the user name you want to change then click Edit.
) Click the Edit Pack Storage section.
) Select the folder on which Windows 10 is installed and wait for Windows 10 to be installed.
) As soon as you enter the setup screen, you will not see the shutdown or restart buttons. This is normal.
) Resume your normal day-to-day activities, and you should find Windows 10 ready to go. If you do not launch the setup screens immediately after upgrading using the Windows 10 Beta for Itself, then your installation process may have failed. Simply follow steps 1 – 5.
) If you didn’t launch the setup screens immediately after upgrading, here are some tips and troubleshooting procedures you can use.
4. How to Install and Activate Windows 10 Using a USB Flash Drive
In this tutorial, you will learn how to create a bootable USB flash drive with the Windows 10 ISO image and how to install and activate Windows 10 using that drive.
On a laptop or desktop, open the Microsoft Windows 10 product image file by pressing the Windows key on your keyboard and on the search bar type image file.
When the image file opens, select the option Create a bootable USB flash drive. Choose the USB Flash drive that you see in the figure below. The image you are looking for is entitled Windows10_RTM_Next.vhd and it can be found in the Windows 10 installation directory on the media disk.
Insert your USB Flash drive and Windows 10 should boot automatically onto your computer and show the Windows logo. Follow all the steps to successfully boot your new computer.
The next part of this tutorial will explain how to use the Windows 10 installation media that you obtained in step 3 above. As mentioned above, Windows 10 is real-time capable and you have the option to run scheduled tasks. Thanks to those scheduled tasks, the operating system can start and stop your computer when the desired tasks are completed.
Before continuing with this step make sure you have downloaded the Windows 10 media file that you wish to use and copied it over to the USB Flash drive that you created earlier. In short, you should unplug your computer’s physical USB cable from your motherboard and plug the USB Flash drive into your computer.
Now, open the Windows device manager. If you find your device under Other devices, click it to open the device manager in Windows 10, as shown in the figure below.
Locate the USB Flash drive and click the USB devices node in the device manager.
Find the Windows 10 media that you previously transferred to your Windows 10 installation media disk and select it.

0 Comments: